Fall is a Good Time for 2026 Planning Is it time to build your next…
11 Essential Steps for Creating Your New Website Design
 Though our Cincinnati web design agency tends to advocate repairing and improving cheap, DIY, outdated, or otherwise bad websites wherever and whenever possible, sometimes a new website build or complete website redesign is necessary.
If your company is new to the web, or if your business has a new website to build, it is important to have a solid web design plan in place before moving forward.
If you are hiring a web designer or web design company to do the work, pre-planning can still save an incredible amount of time and frustration, and guide the process toward having the best results from what will likely be your company’s most important sales and lead generation tool for years to come.
In this post we’ll outline the best process to build a great website with the best marketing potential.
Top most important steps toward designing your new web site:

Bad: “Elmo Haletosis Dinglefaartz the IIIrd: drinks lots of gin, and wears an eyepatch. Hates hayrides and squirrels.”
Good: “Inigo Montoya: Parking lot mogul and CEO with properties in Cincinnati, Covington, and Newport. Has purchased 15 demolition sites in the downtown area and is looking for concrete to pave them with. He does not want to interact or commit at this time, just wants basic questions answered.”
Step 1: Buyer Personas – Know your website’s ideal visitor
It is easy to go down the path of designing a website for the company itself. Many designers go into web design projects with the company’s image or even their own portfolio in mind first, and already in great danger of turning the website into a very expensive vanity project for the designer and company alike.
In this case, let’s imagine a Concrete company whose website boasts that they are the greatest, oldest, and biggest in the area. They have lots of pages on CEOS, CFOs, pictures of big trucks and big projects, and are wondering why the site fails to generate new leads and customers.
While it is important to impress and even dazzle visitors, it is more important to consider the ideal visitors’ primary needs. Knowing what will bring your ideal visitors to your website, knowing what information they’ll be seeking, knowing how to inform and how to boost confidence, having a plan to help them them become satisfied customers should be the primary focus.
Imagine these ideal customers, give them names, ages, likely job titles, unique needs that brought them to you – and write these down. You are done. These are your buyer personas, and you are ready for the next step:
Step 2: Consider the buyer’s journey, and draw them a map
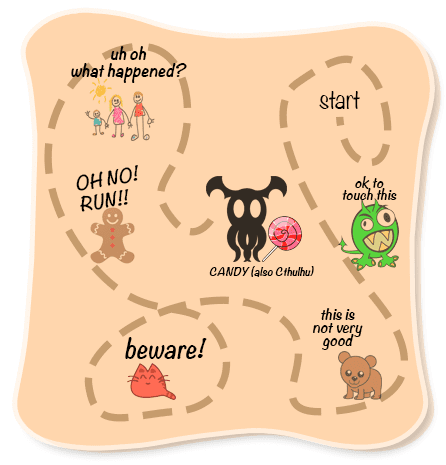
Not a very good map for your website
Put yourself in your buyer persona’s shoes. Consider what problems they came seeking solutions for, what questions helped them find you, how you might help them. Realistically define the process. Is your solution one that might require days, even months of decision-making, or a fast and easy choice? Having buyer personas in mind, allows you to map your website accord to their needs.
You might ask yourself these things:
- How will I attract my buyer persona?
- What information will I need to qualify them as leads?
- What solutions will I need to provide them in return for this information?
- What further interactions will encourage them to change from leads into customers?
- How do I make those customers into return customers?
- How do I encourage them to give great reviews and word of mouth promotion?
If you have answered all of these questions in detail, congratulations – you’ve outlined your marketing path, and sales funnel.

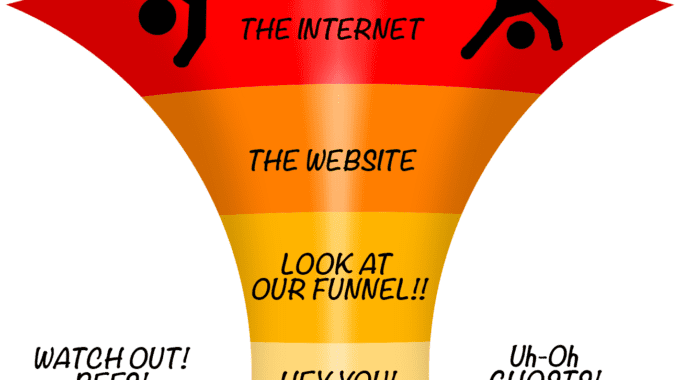
This is not a very good sales funnel for your website. Chances are you will not be allowed to put people into actual funnels, or to feed them to bees.

That’s a little bit better… in a very generic and vague way. Show that you really have a plan for this specific site, for this specific business.

Try to design your funnel specifically for your website, not just *any* site. The funnel could demonstrate a strategy for an entire site or a business – but most often, it will center around only one primary offer.
Step 3: Outline and Flow Chart
 Outline: Be thorough. Think how many pages and subpages deep this website will need to go. Also be sure to consider landing pages, which might not fall into the base hierarchy of the site.
An outline ensures that content flows in a way that is convenient and helpful to the average visitor. It also helps you to think of the process, and what content the process will require. You may find that you need more pages than you thought, but you might also find pages that can be ommited, or can be combined into one.
I recommend working on this outline in a word processing application, or anyplace where you can easily edit bulleted lists within bulleted lists.
When done, you have all you need to create a basic flowchart. Flow charts are simply graphical outlines for people who prefer flow charts over outlines (most people). Since this is mostly to illustrate how one could go from one page to the next, you don’t need to get very fancy with it – blocks and lines will do (like the very simple web site flow chart to the right).
If however everyone involved is familiar with process flow chart symbols, you might want to go a step further and make an actual process flow chart ( https://support.office.com/en-us/article/Create-a-basic-flowchart-f8e57ca2-0c24-4760-bc2e-8812d7310c6a )
Step 4: Block it out.
 Outline: Be thorough. Think how many pages and subpages deep this web site will need to go. Also be sure to consider landing pages, which might not fall into the base hierarchy of the site.
Before doing any graphic design, you need to know how the web site and its elements are going to work together – how they are going to present information, which elements need to grab attention, how, and why.
I like to use a styrofoam board, pins, string, construction paper, and multi-colored Post-its on an open wall or large corkboard. A large table will however do, but is not as fun, and you will probably need that table for other things before the project is completed. Don’t worry now about how the website will look. Think instead about how layers will interact or be animated, where slideshows or movies might go, whether sidebars will exist and where, the function of the footer, which pages might have forms, and how they are to be presented.
Use your content outline as a guide. If you have already selected a CMS and templates, you should also consult those from time to time. Content in this stage, might be as simple as sticky notes that read “colorful image to illustrate B2B”, “bulleted list with types of advertising”, “CTA: View our helpful video!”, or as advanced as photos and printed paragraphs.
Chances are you might eventually need something more portable than the crime wall or office table. If so, refine your flow chart based on the work from this stage, print it, and print numbered pages to correspond with each block. These pages and their content should reflect the pages on your wall.
Step 5: Software selection
By now you should a good idea what sort of CMS you will need for your web design project, as well as what you will need plugins and add-ons for. If you are not designing from a theme you have previously made, and don’t plan to build one from scratch, this would be a good time to choose a theme to build from. This is also a good time to search the web for compatibility issues between software, themes, and plugins.
If the company has graphic standards established, they’ll likely require a specific font stack for their website design. Make sure the needed fonts are available as web fonts, and know how much they will cost.
If the company does not have graphic standards established, this is a something you should discuss. Make sure that creating a corporate identity package is in the budget, or that graphic standards will be available by the time design work begins.
You now have a good idea of how the web site will function, know what software you will be using, and that there no known conflicts between. You also know that everything you are proposing to do can be done, how to do it, and have factored in outside costs.
Step 6: Mid-project meeting

No Skeletor, This meeting is not one of those. This is actually a great place to be and a very exciting time… halfway to launch!
Source: memegenerator.net
Source: memegenerator.net
If you are designing this web site for others, or need to consult with your colleagues, this is a great place for a mid-project meeting.
You’ve got a lot of information to share and things to discuss before moving ahead, perhaps too much. You can’t cover everything here, but what is covered here will be shaped by the priorities, concerns, and schedules of those involved.
You have firmly established purpose, goals, needed software, server requirements, page count, content needs, new challenges, and additional costs. You also have a flow chart that serves as a map to build and design the site by.
This flow chart serves well as an itemized list of textual and graphical content needed for the site. You, the client, or your marketing team should begin creating and collecting the content needed for the completed website – Encourage them to tell their brand story, and to gather and create strong images to illustrate that story with.
Step 7: Installation, Setup, and Testing
 Some web designers would jump to the design stage before this, and if you are designing for others you may at least have been asked to make graphical mockups in order to get this far.
If you have that option, get everything installed, behaving properly, and at least semi-configured before wasting everyone’s time on preemptive design. Hypothetical appearances tend to die horribly from compatibility issues, and actual needs.
If you build in a folder on the site’s intended server, and test it, you will know that the site, and plugins work in that environment. This also gives you the ability to design in place, directly working with the actual product of Javascript, HTML, and CSS that the server-to-be will assemble from the CMS, plugins, and themes you chose.
Step 8: Framework
By the end of this stage, using your outline, you should have a good working website with all navigation working, and all proposed pages created. These pages are likely populated with lorem ipsum and placeholder images at this point, and that is okay.
Step 9: Basic Graphic Standards
This is a mini-stage before adding content. At this stage, we are still not out to create any more design elements than we absolutely have to, but we want a good idea of what our content will look like in order to improve upon it, and to design for it.
Whether you are working from an existing theme, or you started off with a structure that was devoid of any styling at all, this is a small stage where you should change colors and fonts to meet with the company’s graphic standards, and remove styles and graphical elements that would compete with this branding.
Finish this stage by adding the company logo, preferably in .SVG format (Scalable Vector Graphics) so that it looks its very best at any size or resolution.
Step 10: Populate!
What? Still no design? Are you crazy?
Realistically, yes, but also consider that you already have a lot of finished design at this point:
If you have branding, you have fonts, a defined color palette, and a logo. You also have your crime lab-style layout from step 4, meaning that you have the user interface mostly planned out. You also know how navigation and pages will work together as a story to guide your visitors through the website.
If you were able to make it to this stage without submitting graphical mockups for revision, revision, and revision of purely-hypothetical concepts, you have an opportunity to think ahead about graphical styles and touches here, and are a very lucky designer for it. If your job is design only, hopefully you’ve been given content by this point, if it isn’t you should focus on your content creation before proceeding.
Add in all of your text with only general styles (h1, h2, h3, p, br, blockquote, etc.), use placeholders in place of images, use bootstrap rules for your general layout so that all elements of fractional widths behave uniformly and responsively. I’d recommend skipping on internal links at this point, else you’ll have to remember which content you were and were not yet able to assign internal links to.
Be sure to consider SEO in your choosing of permalinks as you go. This is easier to do now than to correct later. Don’t obsess on this if it slows you down though, you can always correct with 301s if you have to, and/or a good find & replace job if your website’s structure is data-driven.
Step 11: FINALLY! Design
This is not the stage where design typically happens, but it is the stage where design *should* happen.
Previous ideas and mockups here would have served more as constraint than inspiration. Making the functionality of the web site mesh with designs made information was gathered and framework, would be much like hammering a non-euclidian peg into a two-dimensional hole.
If you are like me, and have reached the point where working with CSS and HTML in place is much like, even easier than laying out a design in Illustrator or Photoshop, then you will likely be doing the bulk of your web site design with your text editor of choice and an FTP client, while keeping Photoshop, Illustrator, and/or GIMP open for making textures, creating graphics, and editing photos.
However you do your design work, having not spent too much time on graphics up to this point, allows for much better use of time every step of the way, and for a web site that is the product of inspired design, not remedial design.
Step 12: Web Site Design Never Ends
You should be constantly testing, refining, improving, and expanding your site. Beyond testing initial functionality of your website, testing such as A/B testing for different landing pages geared toward different buyer personas is a good place to start.
Blog often, and every time you return to your site, try to think of one small thing to improve on a page or the site itself. If you mark what you changed and when you changed it, you might be able to track these changes against web traffic or visitor behavior.
Always remember: Websites that aren’t growing, are simply dying.
Related Posts